u-OS Datahub
Overview
PROCON-Connect offers a function for coupling with the u-OS Datahub. This allows, for example, data from the backplane bus of a u-OS-based control system to be included in the PROCON-Connect tag cache and processed further.
Coupling
PROCON-Connect must first be connected to the u-OS Datahub as a client. To do this, the following steps must be carried out:
Open the
u-OS Control Centerapp on u-OS.Open the
Identity & accesssection in the menu on the left.Click on the submenu item
Clients.Click on the
Add clientbutton.Assign a unique
Client name.Activate datahub permission
Read & writeandProvide.Click on
Add.Copy the
Client secretfrom the following dialog.Use the
Client secretin the clipboard to switch to PROCON-Connect - it is best to leave the u-OS Control Center open in parallel.In PROCON-Connect, switch to the
u-OS Datahubapp.Client Name,Client IDandClient Secretare transferred here from u-OS. All three values must be identical to the configuration in u-OS.Click the
Savebutton. The connection is now established and the data is exchanged.
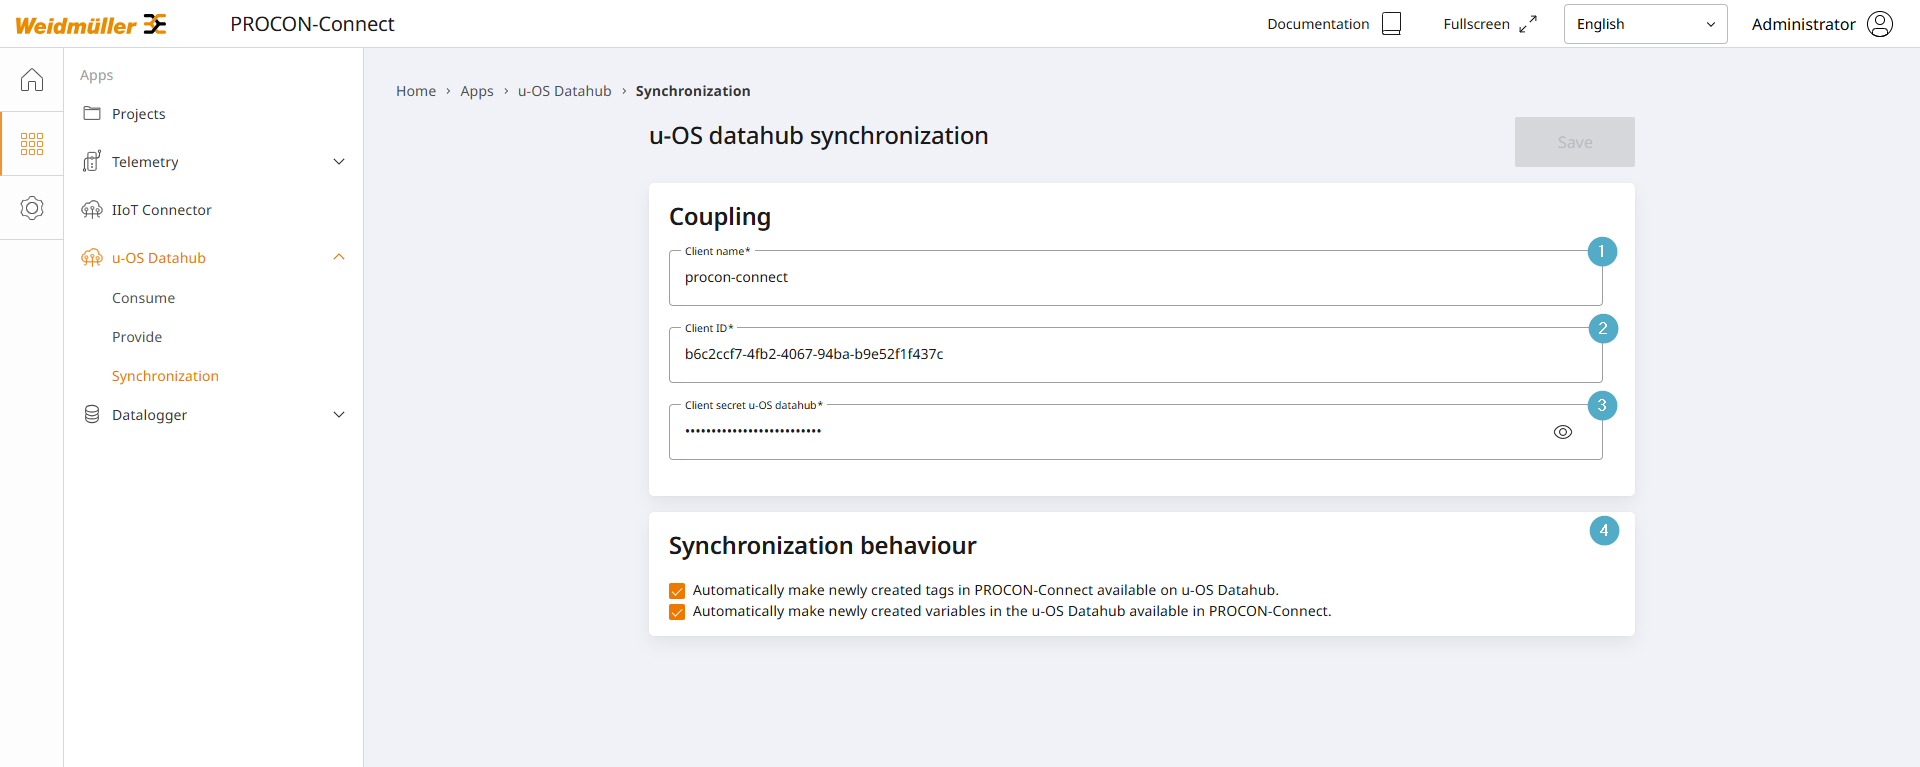
Client Name: Client name from the step sequence described above in the u-OS Control Center. The client name is always visible in the u-OS Control Center and can be copied even after the client has been created.
Client ID: Client ID from the step sequence described above in the u-OS Control Center. The client ID is visible in the u-OS Control Center at all times and can be copied even after the client has been created.
Client secret u-OS Datahub: Client secret from the step sequence described above in the u-OS Control Center. The client secret can only be copied when the client is created. Subsequent access to the secret is not possible.
Synchronization behaviour: These settings can be used to manage whether new tags should be automatically included in the synchronization after the connection has been established.