Configuration
This chapter only describes the configuration options that cannot be found elsewhere in the designer.The other configuration options are described in the respective chapter, for example under “Process coupling” the configuration of process communication.
Configuration project
Project-specific settings are made under the project configuration. This configuration represents a summary of all configurations and each configuration listed there can be found again in the respective section in the designer.
Configuration of the user interface
This configuration can be found under the global configuration of the project as well as under the item “Interface” in the project tree.

Key name |
Input |
Meaning |
|---|---|---|
Schedule interval |
100…60000 |
Specification in milliseconds. Interval duration of the scheduler. The default is 200. |
No value from TagServer (process variable) |
Default value: „?“ |
Displayed value in display fields when TagServer does not (yet) deliver any values |
Driver error (process variable) |
Default value: „!“ |
Value displayed in display fields when a driver error has occurred. |
Below minimum value (process variable) |
Default value: „<“ |
Displayed value when the minimum value of a variable was undershot |
Maximum value exceeded (process variable) |
Default value: „>“ |
Displayed value when the maximum value of a variable has been exceeded |
Max. navigation history |
Indicates how many pages you can switch back and forth in PROCON-WEB using the history function. |
|
Activate touch keyboards |
Standard value: “Only with Num / Bool process variable input” |
Determines the process variable types for which the touch keyboards appear |
Close touch keyboard (after clicking outside) |
Specifies whether the touch keyboard is closed after a click outside the keyboard. The entry is then canceled |
|
Tooltips actived |
Default value: no |
Specifies whether tooltips should / should not be used |
Tooltip fade out animation duration |
Default value: 500 |
The animation duration in milliseconds it takes to fulle fade in the tooltip |
Tooltip fade out delay |
Default value: 1000 |
The duration in milliseconds it takes before the fade in of the tooltip starts |
Tooltip fade out animation duration |
Default value: 500 |
The animation duration in milliseconds it takes to fully fade out |
Tooltip fade in delay |
Default value: 0 |
The duration in milliseconds it takes before the fade out of the tooltip starts |
Tooltip fade in animation duration |
Default value: yes |
The maximum display time of the tooltip in millseconds until it is automaticallyfaded out. If the value is 0, tooltips are displayed until a touch interactionwith another element is performed. |
Tooltip follows cursor |
Default value: yes |
Determines if the tooltip will follow the cursor, or is placed next to the element |
Partial navigation |
Default value: no |
If active, navigation will only be carried out, when you click on the last navigation level. |
Activate navigation via URL |
Specifies whether navigation via the URL’s should be possible |
|
User permission for Esc-Esc |
Definition of the user permission to call “Esc-Esc” |
|
User permission for I key |
Definition of the user permission for calling the “I key” |
|
User permission for L key |
Definition of the user permission for calling the “L key” |
|
User permission for P key |
Definition of the user permission for calling the “P key” |
|
User permission for Alt + T |
Definition of the user permission for call up „Alt + T“ |
|
User permission for print key |
Definition of the user permission to execute a screenshot using the print button on the keyboard |
|
User permission to save a screenshot |
Save user permission for screenshot |
|
Definition of the user permission to save a screenshot |
Definition of the user permission for save screenshot on the server |
|
Definition of the user permission to print a screenshot |
Definition of the user permission to print a screenshot |
|
Selection box for users |
Default value: no |
Show selection box for users in the login dialog |
Delay of the closing function |
Default value: 0 |
Time in ms in which the closing function is carried out |
HTTP Caching aktive |
Default value: inactivated |
In the configuration of the designer in the sub-item “Project” under the category “Client” you can specify whether or not http caching should be activated |
If you activate HTTP caching, certain data is stored in the cache |
||
Enter the title of the runtime |
ProconWeb (Vers. no &. project name) |
Changing the title in runtime |
Select the runtime icon |
Standard GTI logo |
A picture inserted here is displayed as an icon in runtime. The image must be of the Icon .ico type |
Compatible with visibility condition PROCON-WEB 6.2 |
Default value: no |
Selection box to activate the old visibility condition for each control. The field “Visibility: Invisibility” inverts the condition but not the right. Activate only in consultation with our support! |
Render texts in symbols with an offset |
Default value: no |
Checkbox to activate the rendering used in PROCON-WEB bevor version 6.7.Is set automatically when converting a project. |
Export symbols as SVG |
Default value: yes |
Symbols are exported in SVG format for the runtime. |
Use Screenshot API V2 |
Default value: no |
Screenshots are taken by useing the new screenshot API. |
Important
Navigation via URL doesn´t consider any rights
Note
When activating the Screenshot API V2, the familiar screenshot opens and Print dialog. If you want to skip the confirmation dialog, Chrome can be opened via the command level
Configuration Bootpage
The so called bootpage is the one that is shown as long as the services are started but no project yet loaded. The configuration is done via a html-file in the runtime-folder named “boot.hml”.You have to take care that:
no external fonts are used which aren´t installed on the operating sytem
no external CSS
no external JS
no external pictures, only inline SVGs oder Base64 encoded pictures
The file will not be loaded into the runtime automatically. This can be done with JS or this line in the html-header:
<meta http-equiv="refresh" content="1">
The loadtime of the runtime can be increased by this
A picture can be used as well, but has to be encoded in Base64 bevore and assigned to the src-attribute.For this, there are tools online available.
<img src="data:image/png;base64,
iVBORw0KGgoAAAANSUhEUgAAADAAAAAwCAYAAABXAvmHAAAACXBIWXMAAAsTAAALEwEAmpwYAAAE1ElEQVR4nO2Z20/
aZxjHf7FzUUQrIOdjO2tndrlsaa+aieIJD4iclZPGZX/BFm+I1RXQFpGjHLQ6TxXQJu26XnTr9ZJtzbbUJm2autlmWYv0WnrzLC9uxk6FH/
IDtsRv8l7z+T487/s+7/eHYSc60YlyV0RxShgxXxSuGocFq6Y1/ophQ7BifM1b0b/hLfe/4S7pX3MX+h7yFvrWuAu6Ye6C7gJmsZRgxdZ7N418Y
WTAJoqaXwgjJhCumkBwwwiCFSPwVwzAX9YDb0kPvMX+1OIu9AH3Kx1w5nXAntM8Z81prdygjldw8NqIiS6MmgPC6EBSFDVDtvCceS2w57TAvq4B
5ow6yZxV+dkBTU1B4M/GBrSimDkhig5ArvCsWfXumlEBI6TaZgaU6ryBfxgYKhXFBkOiGAInFp4ZVgEzpARGSAH0oGIaCwyVEgrPvjVEOhMb+
Cbf8IygAuiBXqBP995hB6QkwipfYHigT8uhxi+7h0UU7+ZsoBBtwzgA3wM1vh6gemT+nODPrA3qigVP88qA5pEBxdWlOhY8Z72fJoyZ48WEp3q
6geruTJCvSrM/YtE5X3z4LvQPAGWq05sVfO3aII+ISwoXvF8ONV5Zah0BD5SpjiTFKRXgr/7ueJB/eF8PsCdl8OmtcTg7pQKaq/sQ+E6odnbA6cl2
Kz56i6VEGDE9LwQ8y9ENd598D0hPtrfgvFsHVAT9L/jqSSlUOaQv0NCIo/rmiwWpvEMG957+APv14I/HUG1vOwB/2oFWO1Rda/84s4FV43Ax4PcM2
FqPgoeqq21fZDQguGFcxwU/pwXOrAbY14/fNvv1OL4FdU41UCY7joKHyvHWKB4DDzPCz2rh/bABPrvrAL5fDaywKqfKP3q5CbVOVXr4iVaoHG/
5NbOBZUMiE/wHYRM8iv+W+vH7mw+A71UCK6TMX+UnWneXvTme0QBv2ZBM1/MsXy/8/OfTtyC+ffYjcN0KYAYU+an8RKr6QLY172Q2sKRPptuwTO9BA/
+Y4LjkwEDQ+YC3twDZKslsgLvYn0h72syooT5o2Guh/br/7CfgTMmB7pMT1zbjf8PbmoFklWRuoVR6kOmoDKugPqA/1MR3yIRTTjh8hU0CpCuSzJu
Yu9i3juucDyqhfvpwE6hlCGsb2y58hRUZaMx8jKZyG7yXVKAXzvv6YePV5gFYIitfkYJvAtJY4+d4DFzI6ob1y6HO25fWBCHwXzZB+Yj4I1zDHHteu
5XteFDn0cLGy838wY82/o47zUOJWdaPEY8Mzrk0b5kgDH6sEcpHG67ggk+1UVDHQ4lZ1i8pVzecm9KkhjK0ctuwTfvhd8rHGrhYNkJx37GegWiStLft
TpVEwI+JoWxU7MayFS+koDLCyvgx37DpRuLs4C83bJMtl46Xm6Ksspjw5aNiKB9pUGC5CGWVxYIvG/nEg+WsiOJUjb/3ZsHhLzd8jVkuvUNMuBuQkmg+
2Z0CVv42ZiEo3N1TYKgUZZUFaRsLQZU/TCirpLq64nk4bV7lvGHxqtLdTUNxH8XZuUPEJVU2KnZXWSRUrNCiXmvnosSsytG+lT28eAuNB1nfsHmRx
VKCQieU26DoA6UHZHtLgmxvTpJtkiTJ2pQgWZt+QfM8GolTU+V/4TPriU6E/f/1F2g37z10XXwqAAAAAElFTkSuQmCC">
Configuration runtime

Key name |
Input |
Meaning |
|---|---|---|
Hard copy path |
Path |
Path in which the hard copies of images are saved |
File upload path |
Path |
Path that is initially opened for file uploads. Is not evaluated in the runtime |
UserStorage |
Determines how and where user and client-specific data is saved |
|
Path for UserStorage |
Path in which the UserStorage should be saved |
|
Save container settings |
Determines how the container settings are to be saved |
Save container settings
With the “Save container settings” function, you can specifically save a container that can be changed at runtime. The various setting options have the following effects:
No:
Saves changes in the cache
The changes are discarded in the event of a refresh or restart
User specific:
Saves changes to the user
Changes are retained after a restart or refresh - with user login
Identical setting on other devices if it is the same picture and user
Several settings per container possible on all devices
Device specific:
Saves changes with the participant ID
Changes are retained after a refresh and restart
Changes can be overwritten by anyone
One setting per container is possible on one device i.e., different from desktop to desktop, tablet to tablet, etc.!
Both:
Saves changes to the user with the participant ID
Changes are retained after a restart or refresh - with user login
The setting is saved user-specifically for each device
Several settings per container possible on one device
Netzwork (only SCADA)
The network configuration is an image of the PROCON-WEB server network structure. The following illustration shows an example of a network constellation made up of the components of the server and two clients.

The network configuration is called up via Configuration Network in the project tree.

Here you can define which servers should be active in the project.Enter in the left table under “Number of non-dedicated participants”at least the number “one.
Areas (only SCADA)
The areas were created from the “display groups” of the 5-client-server system. The project can be divided into several logical parts via areas, like the plant structure.
Creating areas
Areas are created using the context menu. The assignment of individual clients can also be done optionally via this menu.

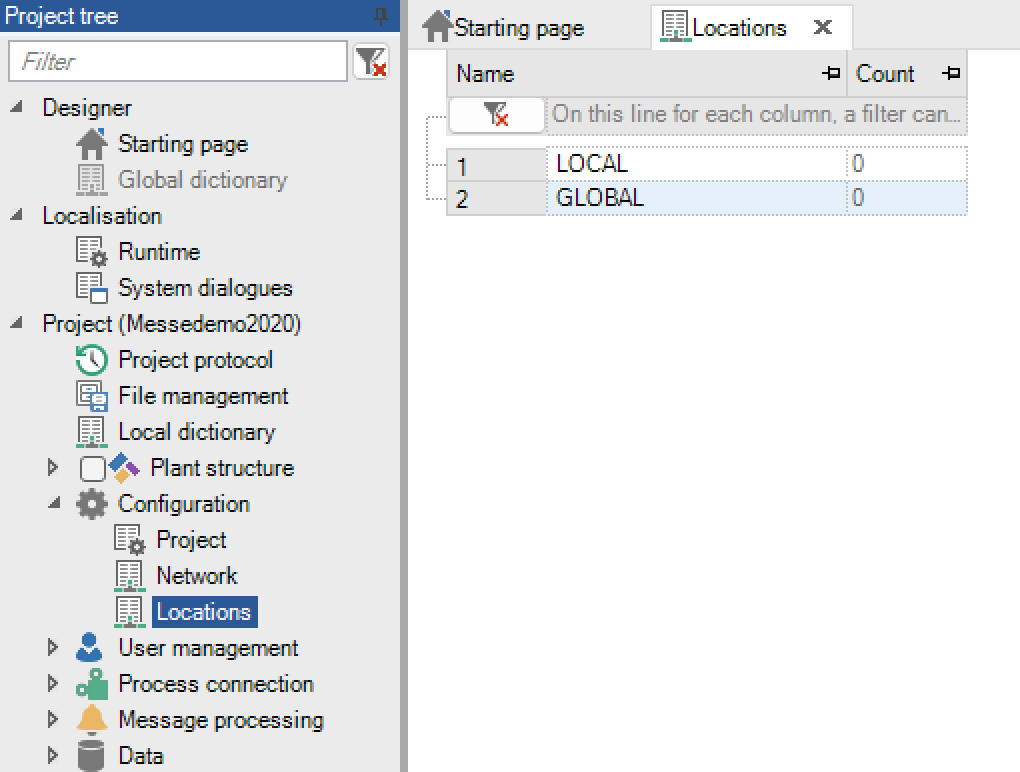
The areas “LOCAL” and “GLOBAL” are default areas and are available in every project.
Usage of areas
In the alarm editor under the “Area” column, the alarms can be assigned to the areas “Local”, “Global” and the areas created by the user. Each alarm is entered in the AlertServer with the PC name when it is triggered. If the alarm is assigned to the “Local” area, it can only be seen or acknowledged on the corresponding client. If the alarm is assigned to the “Global” area, it is displayed on all clients in the network regardless of its trigger computer. If the alarm belongs to a “user-defined area”, the alarm can be displayed and acknowledged on all clients in this area.

When defining groups, the global area or a “user-defined area” can also be assigned to them. Further information on the topic of groups and areas can be found under “User Management.

When defining the input in the image montage, you can also specify the area for which an input may be made. Further information on the topic of rights and areas can be found under User Management.
